# Linux
# 权限管理
因为安全问题,不允许使用root用户
首先需要切换到root, su - (注意有- ,这和su是不同的,在用命令"su"的时候只是切换到root,但没有把root的环境变量传过去,还是当前用乎的环境变量,用"su -"命令将环境变量也一起带过去,就象和root登录一样) 两个命令的最大区别是:sudo 命令需要输入当前用户的密码,su 命令需要输入 root 用户的密码。
# 给当前登录用户提权
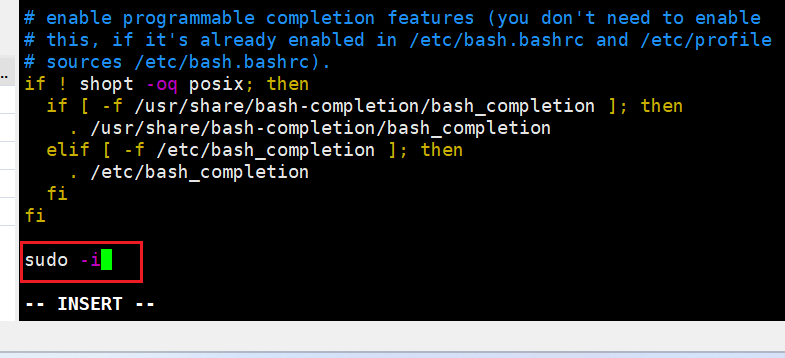
首先切到root用户 sudo -i
chmod u+w /etc/sudoers
vim /etc/sudoers
设置用户执行root命令不需要再次输入密码
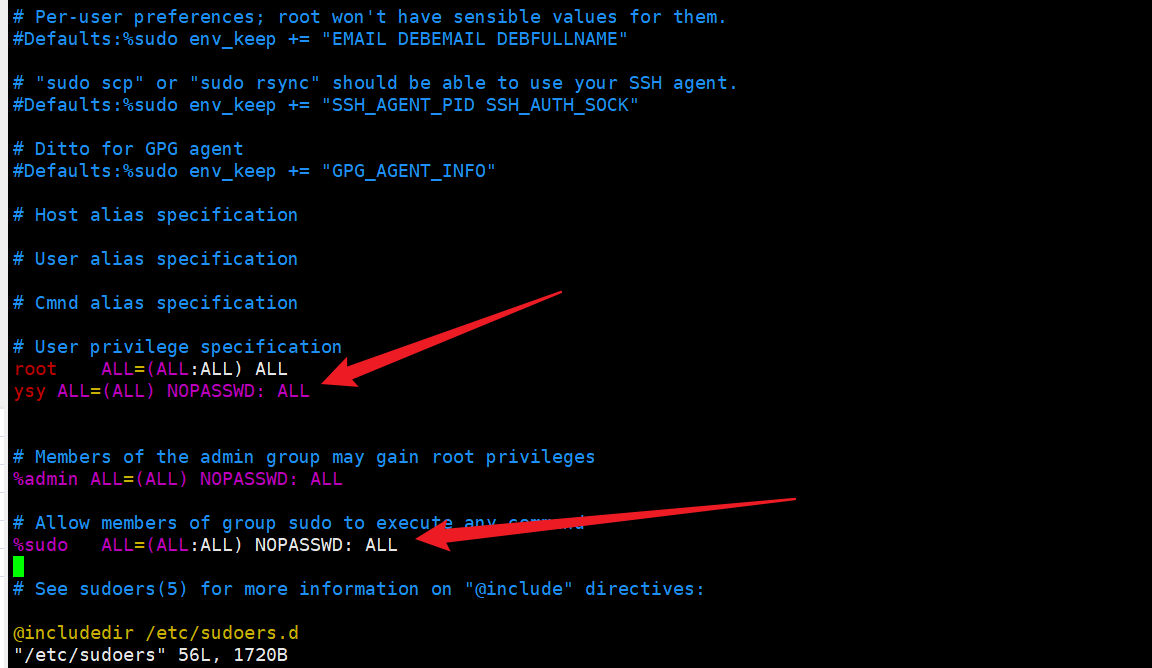
用户名 ALL=(ALL) NOPASSWD: ALL
chmod u-w /etc/sudoers
把用户加入root组
usermod -G root 用户名
登录后自动切到root
# 给文件夹提权
因为文件上传是重新打开了一个session 用的还是登录用户的权限,不是切换到新用户的权限
chmod -R 777 文件夹
# 开启root用户登录
设置root账号密码
sudo passwd root
启用root账号
sudo passwd -u root
修改sshd配置文件允许root用户登录
sudo vim /etc/ssh/sshd_config
修改sshd配置文件允许root用户登录
# 设置为yes
#PermitRootLogin prohibit-password
PermitRootLogin yes
2
3
重启服务
service ssh restart
# 常用命令
# nohup后台启动
nohup主要作用就是可以在后台运行,并可以选择将日志输出到指定文件。如启动jar包,若使用java -jar demo.jar的方式启动程序当窗口关闭的时候程序也停止了,而且日志会直接输出到控制台非常不直观,nohup启动就可以解决这两个问题。
# 不想输出日志
不想输出日志,什么日志都不要,只要服务能正常运行就行了。
nohup ./test.sh > /dev/null 2>&1 &
# 后台运行,日志都输出到output.log
nohup ./test.sh > output.log 2>&1 &
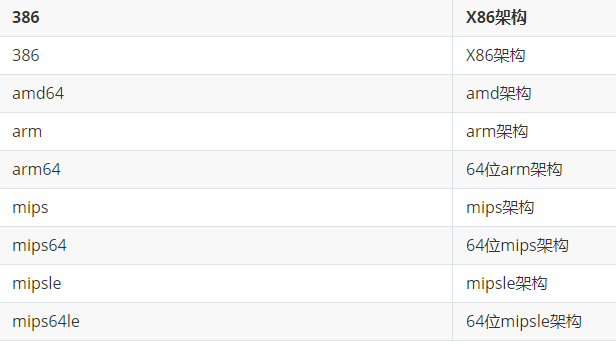
# cpu架构
aarch64 == arm64
# 查看内存占用
free -m | sed -n '2p' | awk '{print "使用内存 "$3"M,总内存 "$2"M,占用百分比 "$3/$2*100"%"}'
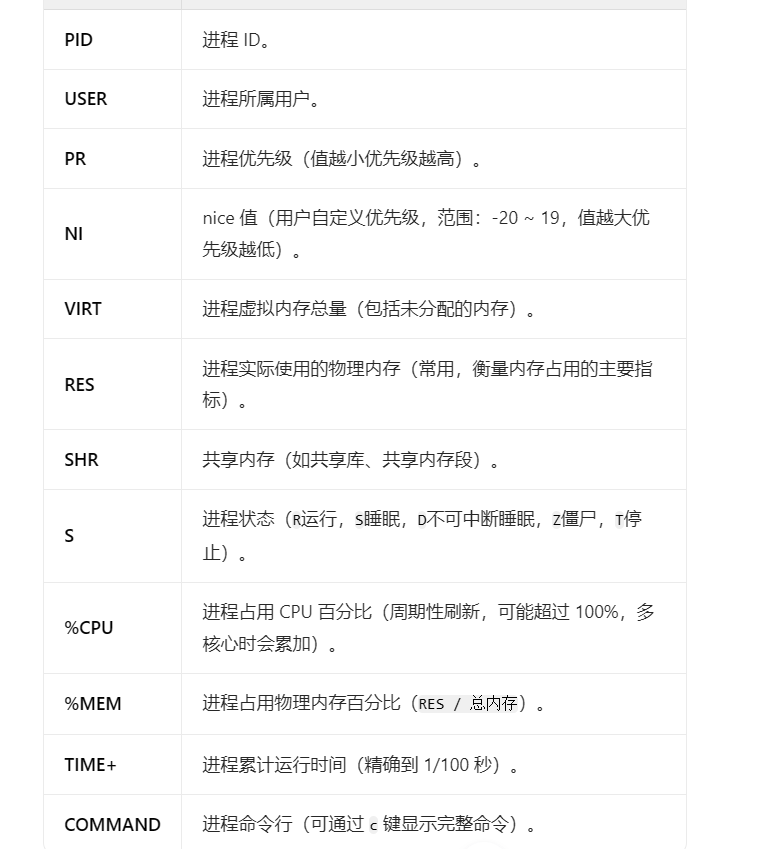
# 查看cpu占用
top -b -n1 | fgrep "Cpu(s)" | tail -1 | awk -F'id,' '{split($1, vs, ","); v=vs[length(vs)]; sub(/\s+/, "", v);sub(/\s+/, "", v); printf "%s\n", 100-v; }'
# 排查cpu占用

top -d 2 -c -p pid
pidstat -u 1 1000
2
# 查看历史命令
history | grep "nacos"
# 按名称kill所有进程
pkill -9 nginx
# 查询磁盘占用
df -hl:查看磁盘剩余空间
df -h:查看每个根路径的分区大小
du -sh [目录名]:返回该目录的大小
du -sh * 获取改目录下每个文件夹的占用大小
du -sm [文件夹]:返回该文件夹总M数
du -h [目录名]:查看指定文件夹下的所有文件大小(包含子文件夹)
du -sh 例如查看当前目录的大小
ls -lh 查看文件大小
分区挂载区别 https://blog.csdn.net/low5252/article/details/102825584
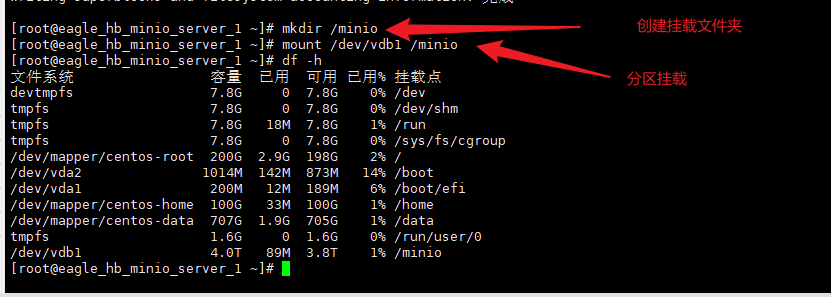
输出说明
- Filesystem:文件系统
- Size: 分区大小
- Used: 已使用容量
- Avail: 还可以使用的容量
- Use%: 已用百分比
- Mounted on: 挂载点
2
3
4
5
6
7
8
9
10
11
12
13
14
15
16
17
18
19
# 获取当前目录下10个最大的文件夹列表
du -hs * | sort -rh | head -n 10
# 查看文件夹下有多少文件
包含子文件夹
ls -lR|grep "^-"| wc -l
# 查看端口占用
netstat -nlp | grep :8686
# 根据使用端口查询进程pid
netstat -lnp | grep -w 端口号

# 根据进程id查看占用文件
ps -p [pid] -o cmd

# firewall防火墙
systemctl start firewalld 开启
systemctl status firewalld 查看防火墙状态
systemctl enable firewalld 设置开机启动
systemctl disable firewalld 禁用开机启动
firewall-cmd --zone=public --remove-port=8080/tcp --permanent 关闭端口
# 临时关闭防火墙,重启后失效,建议不要这样用,否者服务器重启后还得处理这个问题
systemctl stop firewalld
# 禁用防火墙开机自启
systemctl disable firewalld
开放80端口
firewall-cmd --zone=public --add-port=80/tcp --permanent
开放一个端口1000-2000范围
firewall-cmd --permanent --zone=public --add-port=1000-2000/tcp
重启防火墙配置
firewall-cmd --reload
查看开放的端口
firewall-cmd --list-port
# tar 压缩
.tar.gz 和 .tar 不一样 .tar是打包 .tar.gz才是打包压缩
压缩文件, 或者文件夹 并在当前目录下生成压缩包
tar -zcvf rumenz.tar.gz rumenz.txt
解压到当前目录
tar -xzvf rumenz.tar.gz
解压到 /tmp目录
tar -xzvf rumenz.tar.gz -C /tmp
# 系统dns设置
vim /etc/resolv.conf

nameserver 8.8.8.8
nameserver 8.8.4.4
2
3
4
5
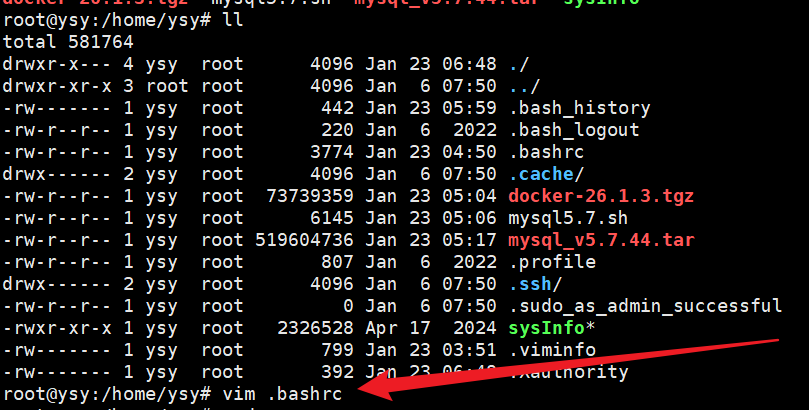
部分系统默认设置中,从xshell中打开xftp时,无法跳转到xshell中的当前目录,xftp默认打开的是/home目录。 解决方案:编辑/root/.bashrc文件,添加一行并保存, source .bashrc 使缓存生效
/root/.bashrc
PROMPT_COMMAND='printf "\033]0;%s@%s:%s\007" "${USER}" "${HOSTNAME%%.*}" "${PWD/#$HOME/~}"'
# tree 命令
tree(选项)(参数)

tree -d .
tree -L 2 .

------- 列表选项 -------
-a            # 显示所有文件和目录。
-d            # 显示目录名称而非文件。
-l            # 如遇到性质为符号连接的目录,直接列出该连接所指向的原始目录。
-f            # 在每个文件或目录之前,显示完整的相对路径名称。
-x            # 将范围局限在现行的文件系统中,若指定目录下的某些子目录,其存放于另一个文件系统上,则将该目录予以排除在寻找范围外。
-L level      # 限制目录显示层级。
-R            # Rerun tree when max dir level reached.
-P pattern    # <范本样式> 只显示符合范本样式的文件和目录名称。
-I pattern    # Do not list files that match the given pattern.
--ignore-case # Ignore case when pattern matching.
--matchdirs   # Include directory names in -P pattern matching.
--noreport    # Turn off file/directory count at end of tree listing.
--charset X   # Use charset X for terminal/HTML and indentation line output.
--filelimit # # Do not descend dirs with more than # files in them.
--timefmt <f> # Print and format time according to the format <f>.
-o filename   # Output to file instead of stdout.
-------- 文件选项 ---------
-q            # 用“?”号取代控制字符,列出文件和目录名称。
-N            # 直接列出文件和目录名称,包括控制字符。
-Q            # Quote filenames with double quotes.
-p            # 列出权限标示。
-u            # 列出文件或目录的拥有者名称,没有对应的名称时,则显示用户识别码。
-g            # 列出文件或目录的所属群组名称,没有对应的名称时,则显示群组识别码。
-s            # 列出文件和目录大小。
-h            # Print the size in a more human readable way.
--si          # Like -h, but use in SI units (powers of 1000).
-D            # 列出文件或目录的更改时间。
-F            # 在执行文件,目录,Socket,符号连接,管道名称名称,各自加上"*","/","@","|"号。
--inodes      # Print inode number of each file.
--device      # Print device ID number to which each file belongs.
------- 排序选项 -------
-v            # Sort files alphanumerically by version.
-t            # 用文件和目录的更改时间排序。
-c            # Sort files by last status change time.
-U            # Leave files unsorted.
-r            # Reverse the order of the sort.
--dirsfirst   # List directories before files (-U disables).
--sort X      # Select sort: name,version,size,mtime,ctime.
------- 图形选项 ------
-i            # 不以阶梯状列出文件和目录名称。
-A            # 使用ASNI绘图字符显示树状图而非以ASCII字符组合。
-S            # Print with CP437 (console) graphics indentation lines.
-n            # Turn colorization off always (-C overrides).
-C            # 在文件和目录清单加上色彩,便于区分各种类型。
------- XML / HTML / JSON选项 -------
-X            # Prints out an XML representation of the tree.
-J            # Prints out an JSON representation of the tree.
-H baseHREF   # Prints out HTML format with baseHREF as top directory.
-T string     # Replace the default HTML title and H1 header with string.
--nolinks     # Turn off hyperlinks in HTML output.
---- 杂项选项 ----
--version     # 输入版本信息。
--help        # 打印使用帮助信息。
--            # Options processing terminator.
2
3
4
5
6
7
8
9
10
11
12
13
14
15
16
17
18
19
20
21
22
23
24
25
26
27
28
29
30
31
32
33
34
35
36
37
38
39
40
41
42
43
44
45
46
47
48
49
50
51
52
53
54
55
56
57
58
59
60
61
# find 命令及查询文件
# find在指定目录下查找
find path -name testfile
find /  -name nginx
find /  -name nginx* #模糊匹配
find /  -mmin -20  #最近20分钟内修改的文件
find /  -mtime -1  #最近1天内修改的文件
2
3
4
5
6
which
# which从环境变量文件(/etc/profile)中的path目录中查找,且which找的都是可执行文件。
which nginx
2
whereis
# 与which类似查询可执行文件,whereis查询更多,会查找出相关的man文件
whereis nginx
2
# 软件安装
# 安装Node
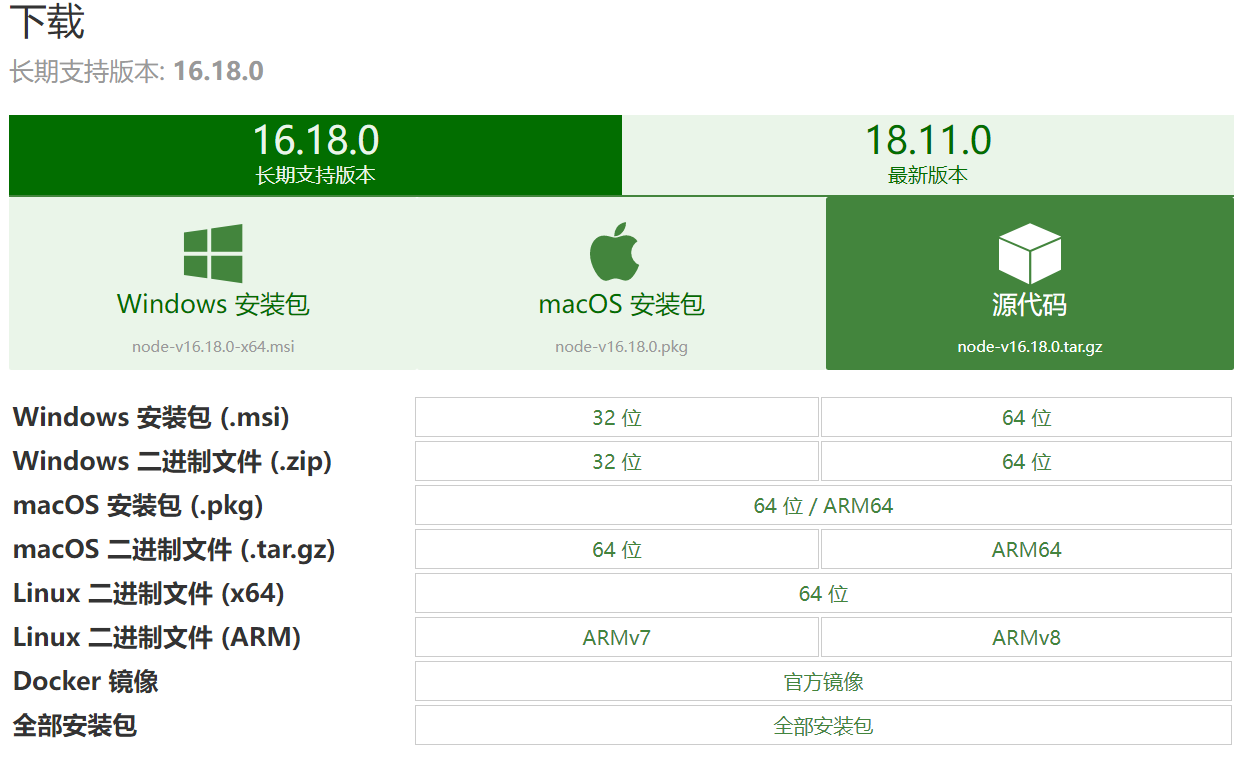
1下载合适的安装包(记得更换架构和版本)
wget https://nodejs.org/dist/v19.0.0/node-v19.0.0-linux-arm64.tar.xz
2.解压安装包
tar -xvJf node-v10.16.3-linux-arm64.tar.xz
# 环境变量
1.编辑配置文件
vim /root/.bashrc
2.设置变量,在文件末尾加入一下代码,记得替换 /usr/local/bin 目录就可以了
export PATH=/usr/local/bin:$PATH
3.重新加载
source /root/.bashrc
# 定时任务
1.编辑定时任务文件
crontab -e
2.示例
# 每天凌晨3点全量备份mysql,并且把sql备份文件同步到备份服务器上。异地容灾,有备无患!
0 3 * * * /root/mysql_backup.sh
2
3.常用命令
-e      (编辑工作表)
-l      (列出工作表里的命令)
-r      (删除工作作)
2
3
4
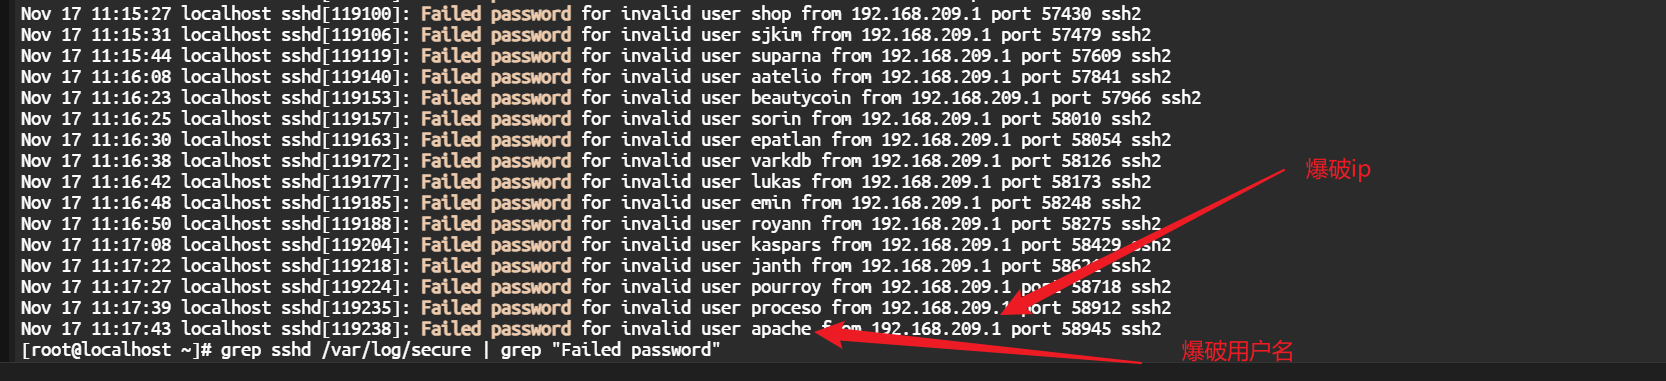
# 安全
查看登录服务器的用户
grep sshd /var/log/secure | grep "Failed password"
# 开机自启动
# 方式一: /etc/rc.local
/etc/rc.local是rc.d/rc.local的软链
1、编辑文件
vim /etc/rc.local
2、添加需要执行的命令 直接写绝对路径就可以,不需要加 . 点代表用户所在的当前路径
/root/mysql_backup.sh
/usr/local/nginx/sbin/nginx
2
3、添加可执行权限
chmod 777 /etc/rc.local
# 方式二: systemctl
1、注册systemctl服务 在/usr/lib/systemd/system目录下创建将nginx.service
vim /usr/lib/systemd/system/nginx.service
[Unit]
Description=nginx
After=network.target
[Service]
Type=forking
ExecStart=/usr/local/nginx/sbin/nginx -c /usr/local/nginx/conf/nginx.conf
ExecReload=/usr/local/nginx/sbin/nginx -s reload
ExecStop=/usr/local/nginx/sbin/nginx -s quit
PrivateTmp=true
[Install]
WantedBy=multi-user.target
2
3
4
5
6
7
8
9
10
11
2、重新加载systemd配置文件
systemctl daemon-reload
3、服务启动
systemctl start nginx
4、设置开机启动
systemctl enable nginx
5、systemctl常用命令
# 查看服务状态
systemctl status xxx
# 启动服务
systemctl start xxx
# 停止服务
systemctl stop xxx
# 重启服务
systemctl restart xxx
# 启用服务开机自启动
systemctl enable xxx
# 禁止服务开机自启动
systemctl disable xxx
# 查看所有已启动的服务
systemctl list-units --type=service
# 修改xxx.service文件后,需要执行 重新加载文件;
systemctl daemon-reload
2
3
4
5
6
7
8
9
10
11
12
13
14
15
16
6、server文件编写说明
service 结尾,一般分为3部分:【unit】、【service】、【install】
| 主要描述 | 关键字段 | |
|---|---|---|
| unit | 此区块信息用于描述当前服务的简单描述: | Description:服务描述信息; Documentation:文档相关信息; After:定义sshd服务应该在哪些服务之后启动; Before:定义sshd服务应该在哪些服务之前启动; Requires:表示强依赖关系,如果sshd服务启动失败或异常退出,则Requires配置的服务也必须退出; Wants:表示若依赖关系,如果sshd服务启动失败或异常退出,不影响Wants配置的服务; |
| service | 此区块定义如何启动当前服务 | type 字段定义启动类型等 simple:默认值,ExecStart字段启动的进程为主进程,如果启动脚本中 以 nohup & 形式启动进程时,此时启动脚本后会自动 kill 当前服务; forking:ExecStart字段将以fork()方式启动,此时父进程将会退出,子进程将成为主进程; 启动,停止,重启命令 EnvironmentFile:环境参数配置文件,文件内部配置参数形式为key=value键值对,可以在service文件中以$key的形式引用配置项; ExecStart:启动服务时执行的命令; ExecReload:重启服务时执行的命令; ExecStop:停止服务时执行的命令; ExecStartPre:启动服务之前执行的命令; ExecStartPost:启动服务之后执行的命令; ExecStopPost:停止服务之后执行的命令; 停止模式 KillMode 表示停止服务时的方式 control-group:默认值,当前控制组里面的所有子进程,都会被杀掉 process:只杀主进程 mixed:主进程将收到 SIGTERM 信号,子进程收到 SIGKILL 信号 none:没有进程会被杀掉,只是执行服务的 stop 命令 PrivateTmp 该字段用于设置服务是否使用私有的 tmp目录; |
| Install | 定义如何安装配置文件 | WantedBy:表示服务所在的服务组; WantedBy=multi-user.target 表示 sshd服务属于 multi-user.target 用户组; multi-user.target 组里的所有服务都将开机启动; |
# 方式三: chkconfig命令
.......待补充
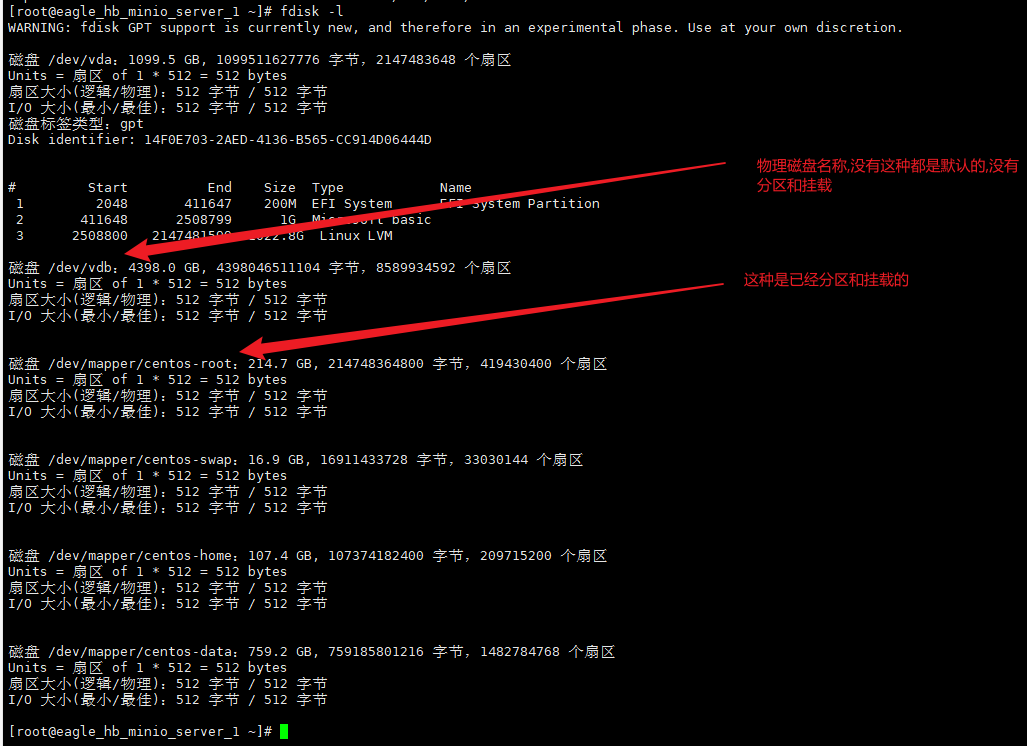
# 硬盘磁盘知识
一个扇区是512字节
分区,相当于一个物理机械硬盘分了c盘f盘两个盘符,只有分区了才可以进行挂载
1、查看可用存储设备有哪些
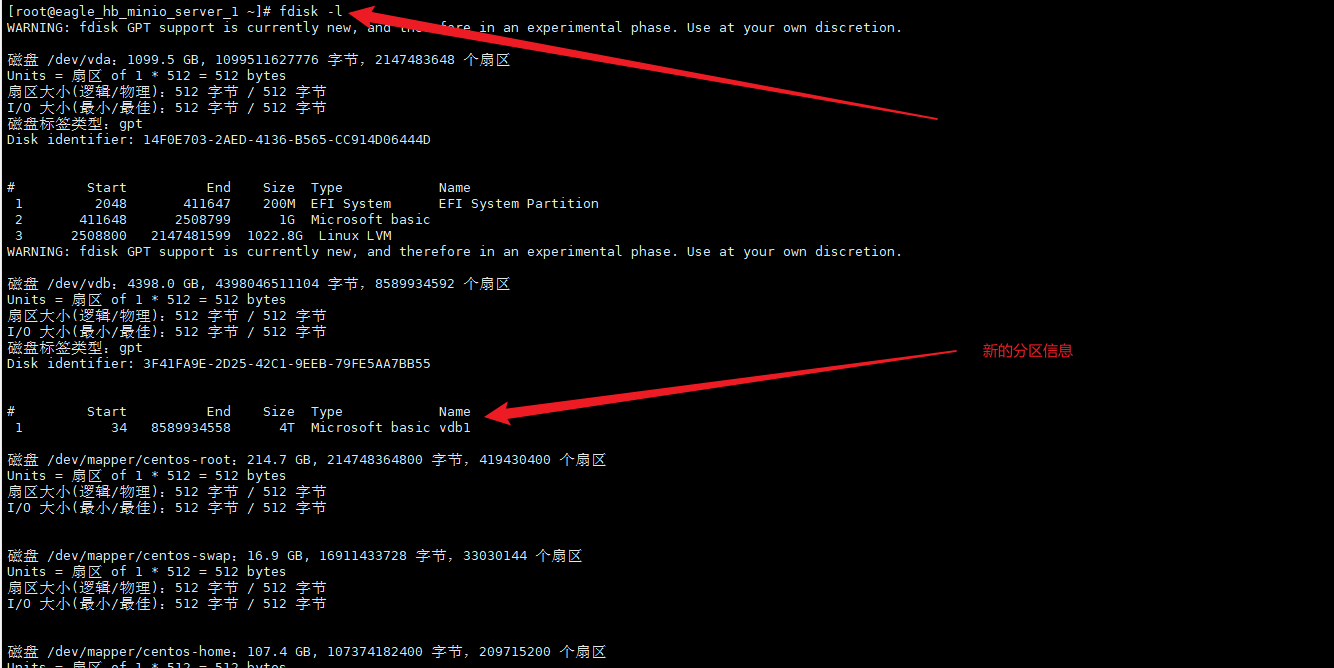
fdisk -l
2、进行分区 小于2Tfdisk
fdisk 设备名称:例如/dev/vdb
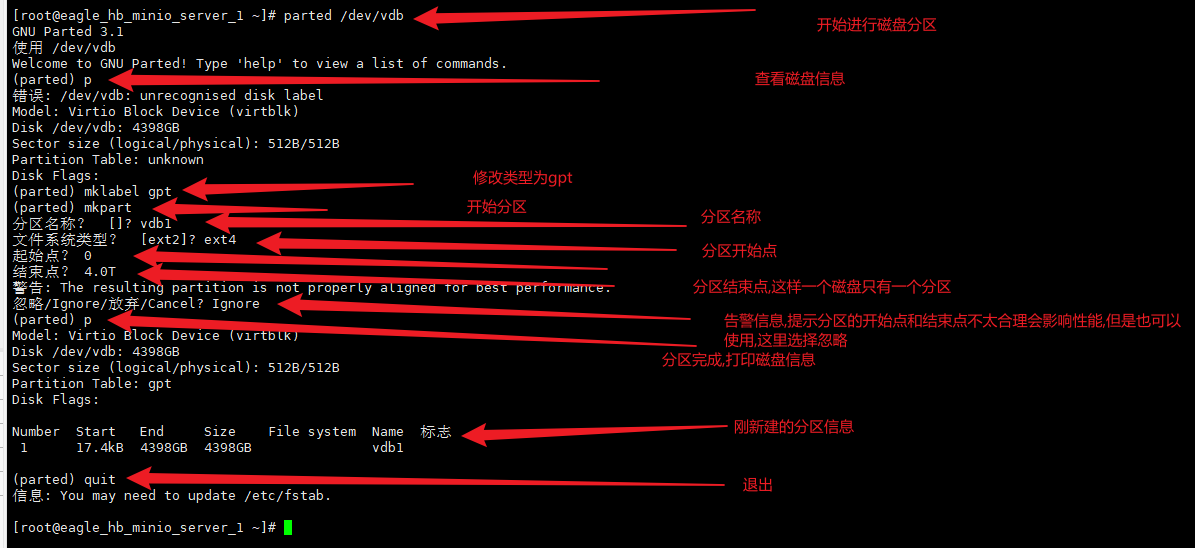
小于2T,用parted
parted 设备名称:例如/dev/vdb
3、在使用fdisk -l查看会多了分区信息
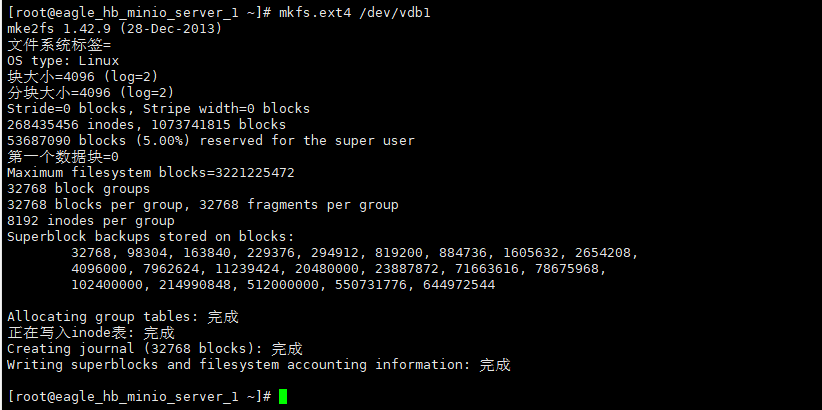
4、格式化分区为ext4类型
mkfs.ext4 /dev/vdb1
5、分区挂载
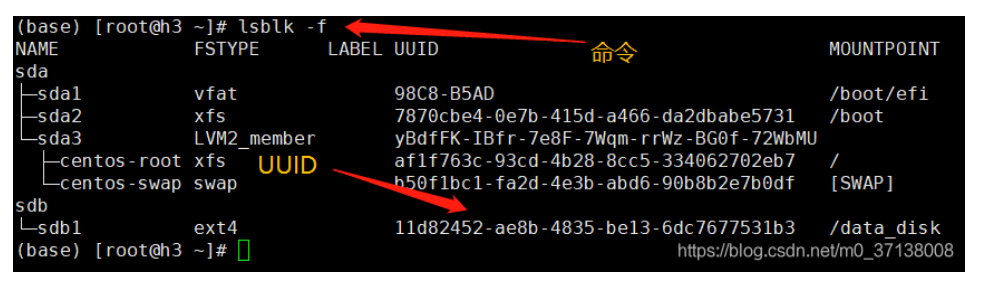
 6、查看对应盘符的uuid
lsblk -f
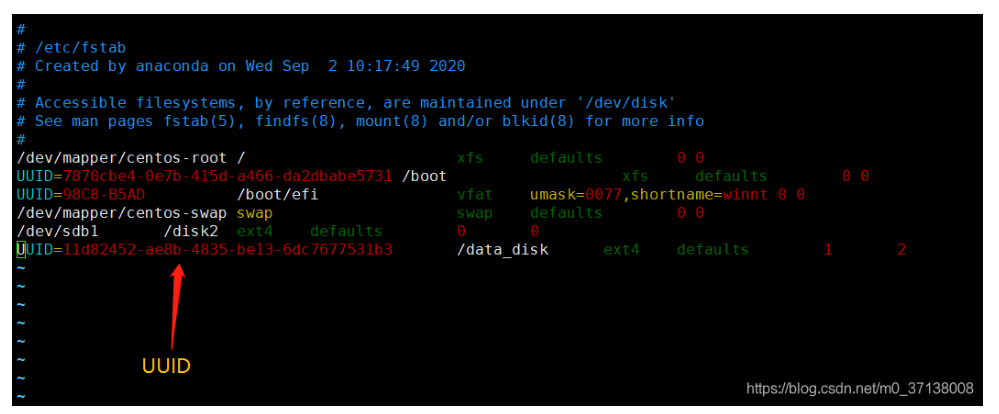
7、设置开机自动挂载 首先我们用vim编辑器打开配置文件进行修改,vim /etc/fstab,把刚格式化就完成的id添加进来。修改成功后重启即可或者命令行输入mount -a 该命令会把配置文件中的所有分区重新挂载一遍。
vim /etc/fstab
mount -a
1个设备4个物理分区,其他都是逻辑分区
参考地址
https://blog.csdn.net/m0_37138008/article/details/109818477
2
# 必备环境
待补充....